Build a campaign
Updated
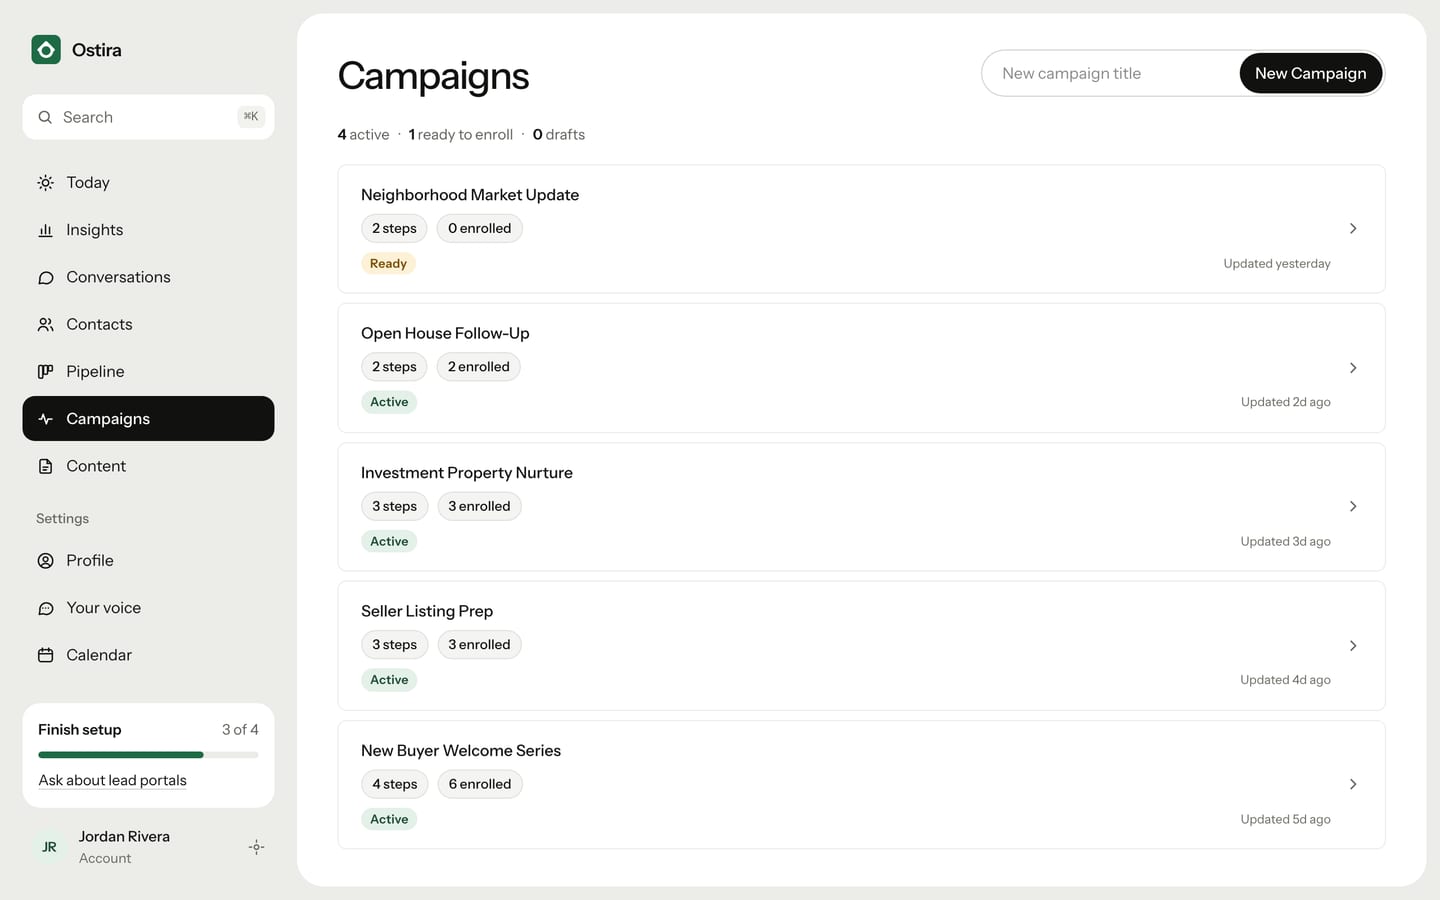
A campaign is a series of emails and texts that Ostira sends to the contacts you enroll, on the days you choose. Here's how to create one and set up its steps.
On the free plan you can have 1 campaign, and every campaign you create counts toward that until you delete it. See Plans and limits.
Create the campaign
- On Campaigns, type a name in the "New campaign title" box.
- Select New Campaign.
The campaign's page opens. It starts with no steps. To have Ostira draft them for you, see Have Ostira write your campaign steps.
Add a step
- On the campaign's page, select + Add step. A new email step opens, set one day after the step before it (the first step starts on day 0).
- Under Send on day, enter the day to send it. Day 0 sends as soon as the contact is enrolled, and day 3 sends three days later.
- Under Channel, select Email or SMS.
- For an email, type the Subject.
- Under Message, replace "Draft message" with your text.
- Select outside the box when you're done.
Your changes save on their own. You'll see "Saving…" and then "Saved". If you see "Not saved" with a reason, fix the problem and select Retry.
Personalize with merge fields
In an email, select Insert field to add one. In a text, type the field yourself, including the curly braces.
| Field | Becomes |
|---|---|
{{firstName}} |
The first word of the contact's name |
{{fullName}} |
The contact's full name |
{{email}} |
The contact's email |
{{phone}} |
The contact's phone |
{{agentEmail}} |
Your email |
{{agentPhone}} |
Your phone, from your Profile |
Fields work in the subject too. If a contact is missing a value, the field is left blank. Select Preview to see the message with sample details filled in.
Change, reorder or delete steps
- To open a step, select it. To close it, select the arrow at its top right.
- To reorder, drag a closed step by its handle on the left. Steps send in list order, so keep the days going up as you go down the list.
- To delete one step, open it, select the trash icon, then Delete.
- To delete several, check their boxes and select Delete selected. To remove every step, select Clear all, then Yes, clear.
You can also select Regenerate to have Ostira rewrite a step in a tone you pick, or Insert from Library to use something from your content library.
Delete a campaign
- On Campaigns, select the campaign.
- At the bottom of its page, select Delete campaign.
- Check what will stop, then select Delete campaign again to confirm.
Deleting removes the campaign, its steps and every enrollment in it. Contacts who were enrolled stop getting its steps right away. Messages it already sent stay in each contact's history, and content you added from your library stays in Content. Deleting can't be undone.
A deleted campaign no longer counts toward the free plan's limit, so you can create a new one.
Fair Housing check
Ostira checks each message for Fair Housing issues when you leave the message box. If it finds any, the step shows the number of issues and a Compliance review panel with suggested changes. You can't enroll contacts while a step has an issue that blocks sending. See How the Fair Housing check works.
What happens next
When your steps are ready, see Enroll contacts in a campaign. Contacts already enrolled get a step's latest text when it sends. An email step is skipped for a contact with no email, and a text step for a contact with no phone. See Why a campaign step was skipped.
Was this helpful?
Still stuck? Email support@ostira.com.